การติดตั้ง Compiler C/C++ สำหรับ Window
โปรแกรม Visual Studio Code รองรับโปรแกรมดีบักสำหรับภาษา C/C++ โดยขึ้นอยู่กับระบบปฏิบัติการที่เรากำลังใช้:
- เป็น Linux ใช้ GDB
- เป็น macOS ใช้ LLDB หรือ GDB
- เป็น Window ใช้ Visual Studio Windows Debugger หรือ GDB (จะตั้งติดตั้ง Cygwin หรือ MinGW ก่อน)
การติดตั้ง MinGW
ในบทความนี้เราจะใช้ MinGW ในการติดตั้งลงบนระบบปฏิบัติการ Window ซึ่งเราจะสามารถตั้งค่าให้ VSCode ให้ใช้ GCC C++ compiler (g++) และ GDB debugger เพื่อสร้างโปรแกรมและรันโปรแกรมนั้นบน Window ได้ เราสามารถดูข้อเพิ่มเติมได้จาก mingw-w64 โดยหลังจากตั้งค่าต่าง ๆ แล้วเราจะสามารถคอมไพล์ รัน หรือ ดีบัก โปรแกรมภาษาซีได้
แตกไฟล์ x86_64-6.3.0-release-posix-seh-rt_v5-rev0.7z
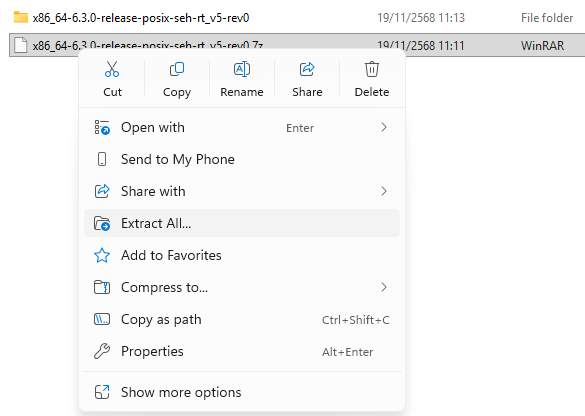
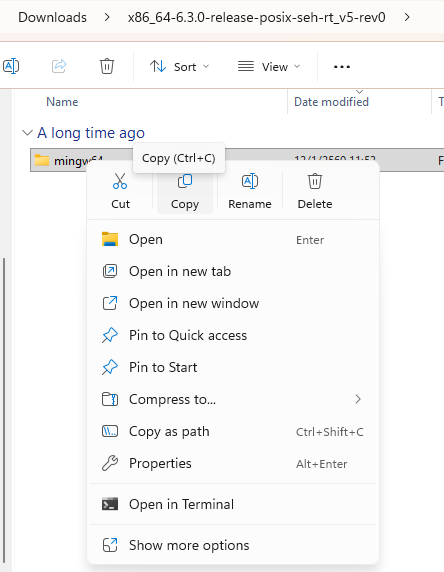
ภายใน Directory ให้คัดลอก “mingw64” ไปไว้ที่ C:\mingw64
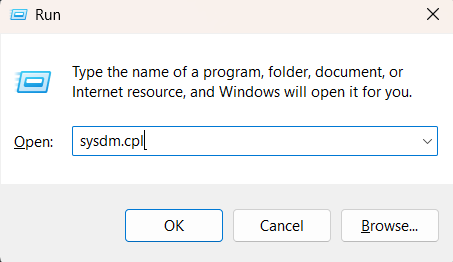
ตั้งค่า Environment Variable
กดปุ่มคีย์บอร์ด Win + R จากนั้นพิม sysdm.cpl
เลือกไปที่ Advance แทปจากนั้นคลิกไปที่ “Environment Variables”
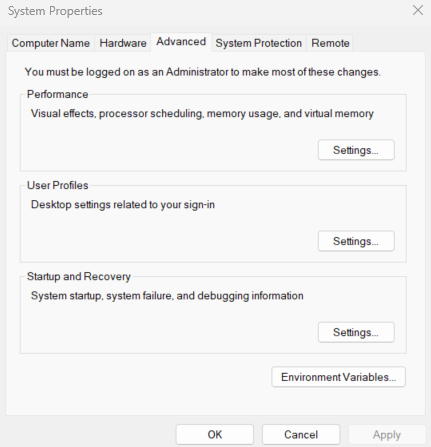
จะปรากฎหน้าจอ
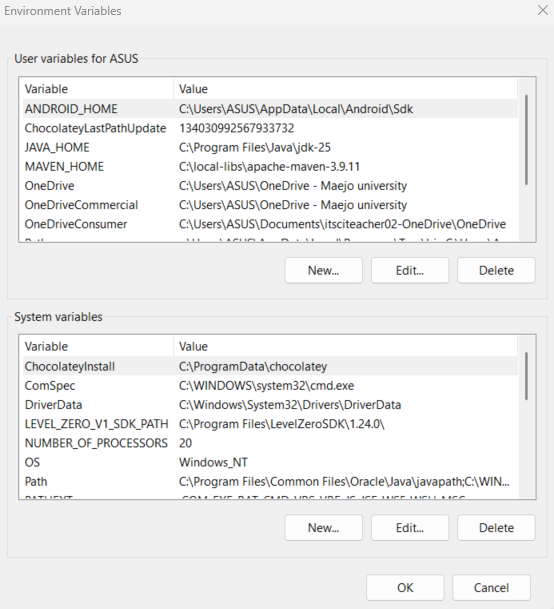
ในช่องบน “User variables for XXXX” (XXXX คือชื่อผู้ใช้ของแต่จะคนไม่เหมือนกัน) จากนั้นค้นหารายการที่ชื่อว่า Path
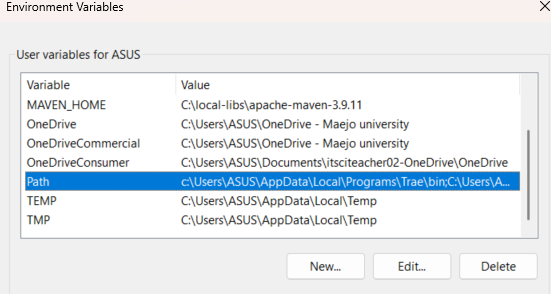
กดปุ่ม Edit…
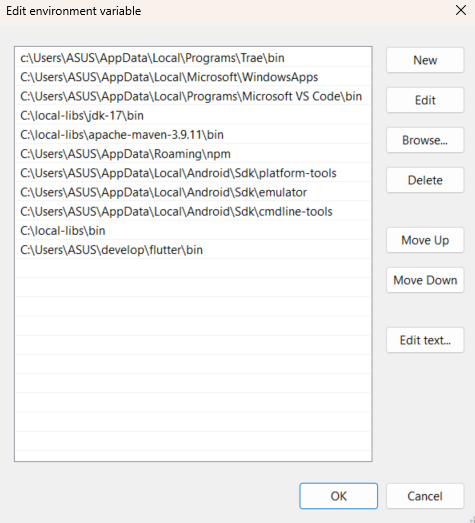
จากนั้นกดปุ่ม New พิมพ์ที่อยู่ของ MinGW64 ดังต่อไปนี้
C:\mingw64\bin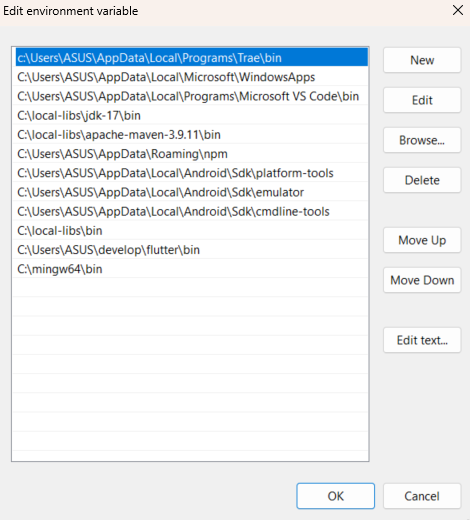
กดปุ่ม “OK” และปิดทุก Window
ตรวจสอบการติดตั้ง MinGW64
ในการตรวจสอบว่าเครื่องมือ MinGW-w64 ของเราได้รับการติดตั้งและพร้อมใช้งานอย่างถูกต้องหรือไม่ ให้เปิดโปรแกรม “Windows PowerShell” พิมพ์คำสั่ง gcc --version ดังแสดง
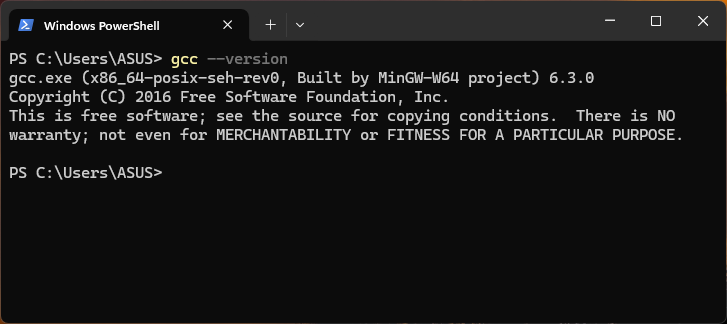
และคำสั่งอื่น ๆ
gcc --version
g++ --version
gdb --version
เราควรเห็นผลลัพธ์ที่ระบุว่าเราได้ติดตั้ง GCC, g++ และ GDB เวอร์ชันใด หากข้อมูลถูกต้อง
ทดสอบเขียนโปรแกรมและรัน
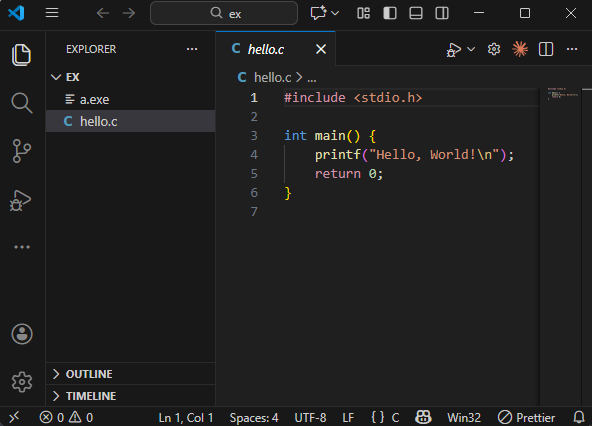
สร้างไฟล์ชื่อ hello.c และพิมพ์โค้ดดังต่อไปนี้ จากตัวอย่าง
#include <stdio.h>

int main() {
    printf("Hello, World!\n");
    return 0;
}
จากตัวอย่างบันทึกไปไว้ที่ C:\Users\ASUS\workspaces\ex\hello.c นักศึกษาสามารถบันทีกไว้ที่ไหนก็ได้ตามสะดวก แต่เมื่อเปิดโปรแกรม Windows PowerShell จะต้องย้ายไปยัง Directory นั้น ดังนั้นจากตัวอย่างการย้ายไปยัง Directory ให้พิมพ์คำสั่งต่อไปนี้ใน Windows PowerShell
PS C:\Users\ASUS> cd C:\Users\ASUS\workspaces\ex
PS C:\Users\ASUS\workspaces\ex> gcc hello.c
PS C:\Users\ASUS\workspaces\ex> dir
Directory: C:\Users\ASUS\workspaces\ex
Mode LastWriteTime Length Name
---- ------------- ------ ----
-a---- 11/19/2025 12:06 PM 54785 a.exe
-a---- 11/19/2025 12:02 PM 80 hello.c
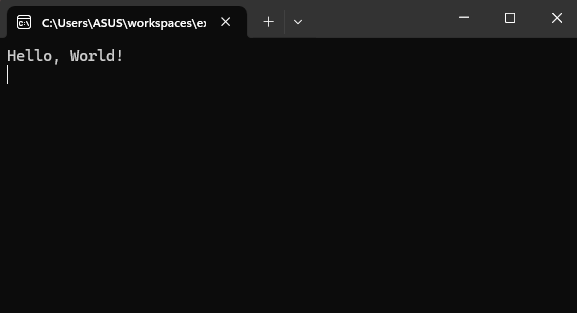
PS C:\Users\ASUS\workspaces\ex> ./a.exe
Hello, World!
PS C:\Users\ASUS\workspaces\ex>การติดตั้งโปรแกรม VSCode
- ติดตั้งโปรแกรม VSCode
- ติดตั้งส่วนเสริม C/C++ extension for VS Code เราสามารถติดตั้ง C/C++ extension โดยค้นหาคำว่า ‘C++’ ในช่องค้นหาใน Extensions view (กดปุ่ม Ctrl+Shift+X เพื่อเปิดหน้า Extensions view)
โดยติดตั้งส่วนเสริมดังต่อไปนี้
- C/C++ IntelliSense, debugging, and code browsing
- C/C++ Themes
- C/C++ Extension Pack
- MemoryView
การทดสอบโปรแกรม Hello World ด้วย VSCode
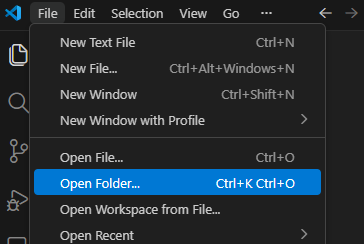
ใน VSCode เลือก File -> Open Folder… จากนั้นเลือกไปยัง Directory ที่เราได้สร้างไฟล์ hello.c เช่น C:\Users\ASUS\workspaces\ex
หากปรากฎหน้าต่าง
การตั้งค่าให้ VSCode สามารถ compile, run, และ Debug ได้
สร้าง Directory และไฟล์ดังต่อไปนี้
.vscode
   ├── launch.json
   └── tasks.json
พิมพ์โค้ดในไฟล์ launch.json ดังต่อไปนี้
{
   "configurations": [
     {
       "name": "C Debug",
       "type": "cppdbg",
       "request": "launch",
       "program": "${fileDirname}\\${fileBasenameNoExtension}.exe",
       "args": [],
       "stopAtEntry": false,
       "cwd": "${workspaceFolder}",
       "environment": [],
       "externalConsole": true,
       "MIMode": "gdb",
       "miDebuggerPath": "C:\\mingw64\\bin\\gdb.exe",
       "preLaunchTask": "build C program"
     }
   ]
 }
และโค้ดไนไฟล์ tasks.json ด้งต่อไปนี้
{
  "version": "2.0.0",
  "tasks": [
    {
      "label": "build C program",
      "type": "shell",
      "command": "gcc",
      "args": [
        "${file}",
        "-g",
        "-o",
        "${fileDirname}\\${fileBasenameNoExtension}.exe"
      ],
      "group": {
        "kind": "build",
        "isDefault": true
      }
    }
  ]
}
การตั้งค่าสำหรับ Macbook
launch.json สำหรับ Macbook
{
  "version": "0.2.0",
  "configurations": [
    {
      "name": "C Debug (LLDB)",
      "type": "cppdbg",
      "request": "launch",
      "program": "${fileDirname}/${fileBasenameNoExtension}",
      "args": [],
      "stopAtEntry": false,
      "cwd": "${fileDirname}",
      "environment": [],
      "externalConsole": true,
      "MIMode": "lldb",
      "preLaunchTask": "build C program"
    }
  ]
}
tasks.json สำหรับ Macbook
{
  "version": "2.0.0",
  "tasks": [
    {
      "label": "build C program",
      "type": "shell",
      "command": "gcc",
      "args": [
        "${file}",
        "-o",
        "${fileDirname}/${fileBasenameNoExtension}",
        "-g",
        "-O0"
      ],
      "group": {
        "kind": "build",
        "isDefault": true
      }
    }
  ]
}
สรุปเราจะมีไฟล์ต่างๆ ดังต่อไปนี้
>EX
  ├──.vscode
  │    ├── launch.json
  │    └── tasks.json
  ├── a.exe
  └── hello.c
ทดสอบใช้โปรแกรม VSCode รันโปรแกรม เลือกไอคอน  ในแถบเครื่องมือด้านซ้าย เปิด-ไฟล์ hello.c จากนั้นกดปุ่ม
  ดังแสดงในรูป
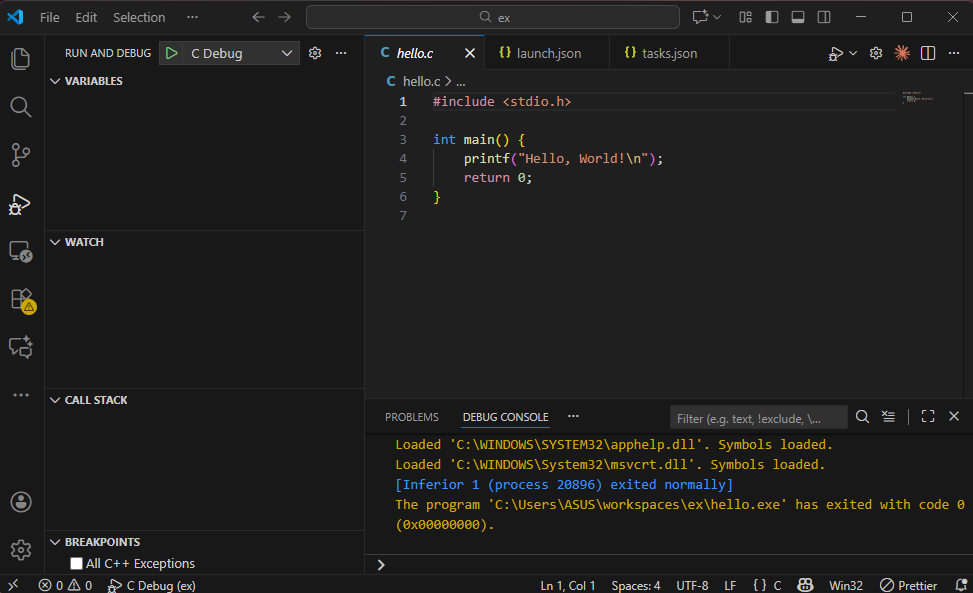
โปรแกรมจะรันและปิดตัวเองลงอย่างรวดเร็ว หากต้องการดูผลลัพธ์ให้กำหนด Break Point
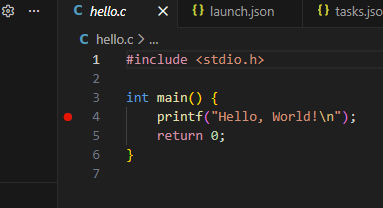
การตั้งค่า Break Point
- ใช้เมาส์คลิกไปที่ตัวเลขในไฟล์ hello.c จะปรากฎปุ่มสีแดง ดังแสดง
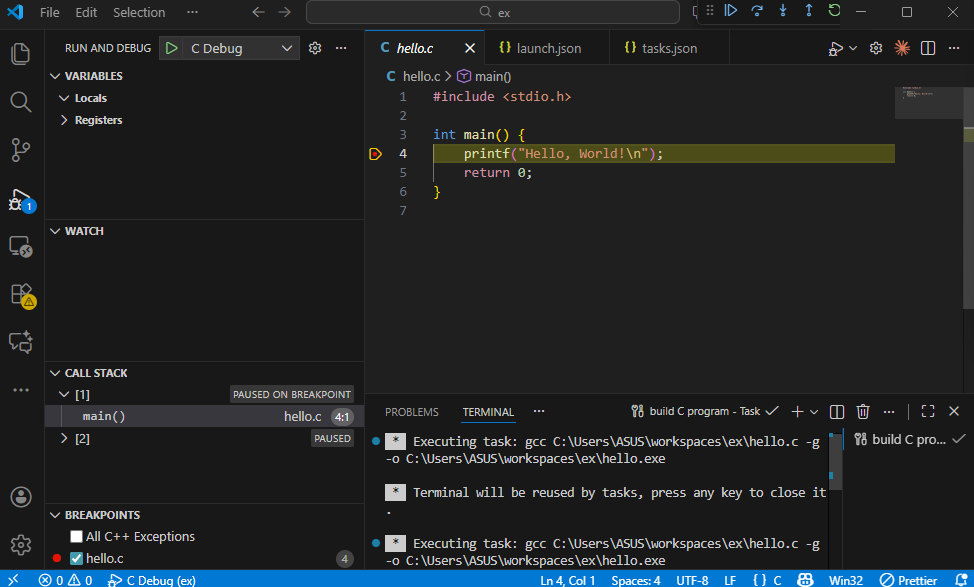
ทำการรันและทดสอบอีกครั้ง โปรแกรมจะทำงานแต่จะหยุดรอ ณ. ตำแหน่งที่เรากำหนดให้หยุดหรือที่เราเรียกว่า break point พร้อมทั้งแสดงหน้าจอ output ดั
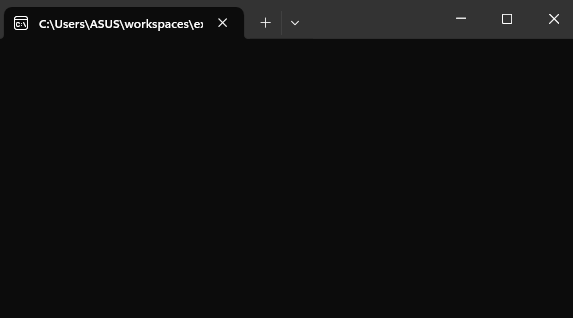

ให้นักศึกษากดปุ่ม ![]() เพื่อให้โปรแกรมทำงานต่อทีละคำสั่ง และจะแสดงผลลัพธ์ดังต่อไปนี้
เพื่อให้โปรแกรมทำงานต่อทีละคำสั่ง และจะแสดงผลลัพธ์ดังต่อไปนี้